Reward list:
* Metal Silver Earrings
* Metal Heart Earrings
* 60% Shoe for Jump scroll
* 60% Wand for Magic ATT scroll
* 60% Cape for INT scroll
* 60% Earring for INT scroll
* 10% Cape for DEX scroll
* 10% Shield for DEF scroll
* 10% Topwear for DEF scroll
* 70% Topwear for DEF scroll
* 100 Blue Potion
* 100 White Potion
* 20 Elixir
* 10 Power Elixir
After receiving your reward, you'll be warped again to the PQ exit.
If your party didn't manage to save Romeo/Juliet, you will receive the 90,000 exp after defeating Frankenroid, but no bonus exp and no prizes.
Saturday, October 24, 2009
Boss Stage
Boss Stage
Monsters: Frankenroid/Angry Frankenroid, Reinforced Iron Mutae, Reinforced Mithril Mutae, Neo Huroid
The door after stage 6 will bring you to a map called Hidden Street: Entrance to Center Lab. This map is just an area to wait for the rest of your party to finish stage 6. You're free to head into the center lab at any time, but you probably shouldn't summon the boss until everyone's there. Just as a suggestion.
When you enter the boss room, before summoning the boss, you should generally allocate a party member to protect Romeo/Juliet.

This is where your freezer/stunner comes into play. Romeo and Juliet only have 30,000 HP, and with no one protecting them, they are almost bound to die.
Once everyone is buffed and ready, have the party leader click Yulete, who is waiting around the middle of the lab. He will disappear, and in his place will appear Frankenroid (or Angry Frankenroid, if you've completed the PQ differently). He will summon reinforced mithril and iron mutaes upon spawn.

Frankenroid
Level: 81
HP: 660,000
EXP: 12,000
Avoidability: 28
Knockback: 6,000

Angry Frankenroid
Level: 84
HP: 800,000
EXP: 25,000
Avoidability: 33
Knockback: 6,000
While the majority of your party is fighting Frankenroid, two neo huroids will spawn at a time on Romeo/Juliet's platform.
Frankenroid can cast darkness, so carrying eyedrops while fighting him can be useful. He can also curse party members back to the Entrance to Center Lab map, and create a poison fog around him. He also jumps/stomps, does a suckerpunch attack, and does high touch damage. While he's an annoying boss, he's no where near impossible. A party of 7x members can take him down without much difficulty, as long as you pay attention and are prepared, pot-wise. A priest helps, too.

When Frankenroid is defeated, he will drop a mass of mesos and assorted HP and MP pots. You will receive 90,000 exp, and an extra 15,000 if you successfully protected Romeo/Juliet.
If you managed to successfully protect Romeo/Juliet, Romeo and Juliet will appear. To finish the PQ, speak to the NPC who brought you in originally. They will ask you to find Yulete, and warp you to a map called Traces of Yulete. At the end of the map is Yulete.

Speak to Yulete, and you'll get warped off again, back to Romeo and Juliet. They will reward you with a Zenumist or Alcadno marble (depending on which society you started in) and a generic PQ reward, usually a scroll or some pots. After collecting 35 of each marble, you can make the Eye of Horus, a pendant that adds 3 to each stat and 60 HP/MP. It can be scrolled with a Rock of Wisdom. Rocks of Wisdom can be made by Yulete using 10 of either marbles.
If your party defeated Angry Frankenroid/upon summoning Angry Frankenroid (unconfirmed), your party leader will be given an option to spare Yulete. In the boss stage you will see a more contrite Yulete, and you will gain 35,000 bonus EXP. Your party will also gain access to Hidden Street: Yulete's Lab, where you can start Yulete's quests. If you complete these quests, Yulete will allow you to form an Eye of Horus pendant using the Zenumist/Alcadno marbles.
Monsters: Frankenroid/Angry Frankenroid, Reinforced Iron Mutae, Reinforced Mithril Mutae, Neo Huroid
The door after stage 6 will bring you to a map called Hidden Street: Entrance to Center Lab. This map is just an area to wait for the rest of your party to finish stage 6. You're free to head into the center lab at any time, but you probably shouldn't summon the boss until everyone's there. Just as a suggestion.
When you enter the boss room, before summoning the boss, you should generally allocate a party member to protect Romeo/Juliet.
This is where your freezer/stunner comes into play. Romeo and Juliet only have 30,000 HP, and with no one protecting them, they are almost bound to die.
Once everyone is buffed and ready, have the party leader click Yulete, who is waiting around the middle of the lab. He will disappear, and in his place will appear Frankenroid (or Angry Frankenroid, if you've completed the PQ differently). He will summon reinforced mithril and iron mutaes upon spawn.
Frankenroid
Level: 81
HP: 660,000
EXP: 12,000
Avoidability: 28
Knockback: 6,000
Angry Frankenroid
Level: 84
HP: 800,000
EXP: 25,000
Avoidability: 33
Knockback: 6,000
While the majority of your party is fighting Frankenroid, two neo huroids will spawn at a time on Romeo/Juliet's platform.
Frankenroid can cast darkness, so carrying eyedrops while fighting him can be useful. He can also curse party members back to the Entrance to Center Lab map, and create a poison fog around him. He also jumps/stomps, does a suckerpunch attack, and does high touch damage. While he's an annoying boss, he's no where near impossible. A party of 7x members can take him down without much difficulty, as long as you pay attention and are prepared, pot-wise. A priest helps, too.
When Frankenroid is defeated, he will drop a mass of mesos and assorted HP and MP pots. You will receive 90,000 exp, and an extra 15,000 if you successfully protected Romeo/Juliet.
If you managed to successfully protect Romeo/Juliet, Romeo and Juliet will appear. To finish the PQ, speak to the NPC who brought you in originally. They will ask you to find Yulete, and warp you to a map called Traces of Yulete. At the end of the map is Yulete.
Speak to Yulete, and you'll get warped off again, back to Romeo and Juliet. They will reward you with a Zenumist or Alcadno marble (depending on which society you started in) and a generic PQ reward, usually a scroll or some pots. After collecting 35 of each marble, you can make the Eye of Horus, a pendant that adds 3 to each stat and 60 HP/MP. It can be scrolled with a Rock of Wisdom. Rocks of Wisdom can be made by Yulete using 10 of either marbles.
If your party defeated Angry Frankenroid/upon summoning Angry Frankenroid (unconfirmed), your party leader will be given an option to spare Yulete. In the boss stage you will see a more contrite Yulete, and you will gain 35,000 bonus EXP. Your party will also gain access to Hidden Street: Yulete's Lab, where you can start Yulete's quests. If you complete these quests, Yulete will allow you to form an Eye of Horus pendant using the Zenumist/Alcadno marbles.
Stage 6
Stage 6
Monsters: None
This is possibly the most annoying stage in a PQ to exist. Ever.
When you first enter stage 6, you will be in a hallway with four doors. Each party member takes a door.

When you enter your door, this is what greets you.
There are 10 levels of 4 platforms. Only one platform on each level will send you higher; the other ones will send you back to the very bottom. Here's the catch: if X platform on level Y is correct in your room, it will be incorrect for all your party members in their rooms. For this reason, you should let your party know which platform is correct for you on which level, to make the stage quicker.
Oh, and the combinations reset every PQ.

When the first member reaches the top and enters the next map, every member in the party will receive 20,000 experience.
When you reach the top, just go through the door.
Monsters: None
This is possibly the most annoying stage in a PQ to exist. Ever.
When you first enter stage 6, you will be in a hallway with four doors. Each party member takes a door.
When you enter your door, this is what greets you.
There are 10 levels of 4 platforms. Only one platform on each level will send you higher; the other ones will send you back to the very bottom. Here's the catch: if X platform on level Y is correct in your room, it will be incorrect for all your party members in their rooms. For this reason, you should let your party know which platform is correct for you on which level, to make the stage quicker.
Oh, and the combinations reset every PQ.
When the first member reaches the top and enters the next map, every member in the party will receive 20,000 experience.
When you reach the top, just go through the door.
Stage 5
Stage 5
Monsters: Reinforced Mithril Mutae, Reinforced Iron Mutae
When you enter stage 5, a dialog box will appear, and a number of monsters will be summoned.


Reinforced Iron Mutae

Reinforced Mithril Mutae
Just kill the mutaes, and have the party leader click the bookswitch on the platform.


You will be rewarded with 20,000 experience. A portal will open to the right, go through it and continue on to stage 6.
IF YOU WISH TO FIGHT ANGRY FRANKENROID AT THE BOSS STAGE, READ HERE!
To make Angry Frankenroid spawn in the boss room instead of Frankenroid, have a member of your party slowly walk forward into the room until a small bit of crazy Yulete can be seen.
If you go any further than this, the monsters will spawn, Yulete will disappear, and regular Frankenroid will spawn. Be careful!
Have the member of your party click Yulete. If a dialog box comes up that mentions something about hearing mumbling from Yulete, Angry Frankenroid will spawn in the boss room. Angry Frankenroid will reward 35,000 bonus EXP upon defeat.
You must also have turned in Romeo/Juliet's letter.
Defeating Angry Frankenroid in the boss stage will give you a second option, allowing you to save Yulete, and will gain you access to Hidden Street: Yulete's Lab. This map allows you to start the quests required to create the Eye of Horus pendant.
Monsters: Reinforced Mithril Mutae, Reinforced Iron Mutae
When you enter stage 5, a dialog box will appear, and a number of monsters will be summoned.
Reinforced Iron Mutae
Reinforced Mithril Mutae
Just kill the mutaes, and have the party leader click the bookswitch on the platform.
You will be rewarded with 20,000 experience. A portal will open to the right, go through it and continue on to stage 6.
IF YOU WISH TO FIGHT ANGRY FRANKENROID AT THE BOSS STAGE, READ HERE!
To make Angry Frankenroid spawn in the boss room instead of Frankenroid, have a member of your party slowly walk forward into the room until a small bit of crazy Yulete can be seen.
If you go any further than this, the monsters will spawn, Yulete will disappear, and regular Frankenroid will spawn. Be careful!
Have the member of your party click Yulete. If a dialog box comes up that mentions something about hearing mumbling from Yulete, Angry Frankenroid will spawn in the boss room. Angry Frankenroid will reward 35,000 bonus EXP upon defeat.
You must also have turned in Romeo/Juliet's letter.
Defeating Angry Frankenroid in the boss stage will give you a second option, allowing you to save Yulete, and will gain you access to Hidden Street: Yulete's Lab. This map allows you to start the quests required to create the Eye of Horus pendant.
Stage 4

Neo Huroid
At this point of the PQ, if a member of your party found Romeo/Juliet's letter back in stage 1, you have the option to let their partner read it now. To get their partner to read it, just have the party member with the letter talk to Romeo/Juliet.

Stage 4 is where your thief and magician come into play. Upon death, the neo huroids will occasionally drop a key card.

These are used to open the doors on the left and right of the map. The doors cannot be opened without a key card, which means that if you don't have a card ready when your thief/magician is done, you'll be stuck with one less party member until you find one. The key card only opens the door for a short while, so make sure your thief/magician is ready to enter the room when the card is dropped.
The key cards can be brought into the rooms with you, but they will not open the doors from inside.

Behind these doors is a jump quest. These rooms will take away 100 HP every 3 seconds from the person inside, so it is important to have them in and out as fast as possible.
The thief portal jump quest is made up entirely of scrolling platforms. After a few practises, it is pretty easy to do. It will take a few runs to get entirely used to it though, as the area is mostly blacked out as it was in stage 2.

Along the top row of platforms are 5 or 6 boxes. Your thief needs to carefully hit these boxes open and look for the Alcadno's Experiment Documents. The boxes will occasionally drop items such as unagi, pure water, mana elixirs, and mesos.


Once your thief has the documents, they need to make their way back down to the door they came in through, and another party member should drop a key card outside the door to let them out. The documents should then be given to Romeo or Juliet.

This process needs to be repeated for the door on the right side of the map, which requires a magician with maxed teleport.
The magician jump quest is relatively simple. Just teleport to the up and right of the map, hitting the boxes and searching for the Zenumist documents. When you find them, just teleport back to the door at the bottom left.

Thank you x3babyraver!
When both documents are handed over, all of the neo huroids will disappear, and the NPC will open the door to stage 5.
Stage 3
Stage 3
Monsters: Homunculus

The aim of this stage is to fill the three large beakers with suspicious liquids, dropped by the homonculus.

Beware: the beakers leak. It is advised to get a stock of suspicious liquids next to the beaker, and then get your party to put them all on at once.

To fill up the beaker, just drop a suspicious liquid on top of it. As they are one-of-a-kind items, only one suspicious liquid can be held at a time. When the beakers are filled, they stop leaking and stop absorbing the suspicious liquids.

Homunculus
When all three beakers are full, all of the homonculus on the map will disappear, you will be rewarded with 20,000 exp, and a portal will open. Continue through the portal onto stage 4.
Monsters: Homunculus
The aim of this stage is to fill the three large beakers with suspicious liquids, dropped by the homonculus.
Beware: the beakers leak. It is advised to get a stock of suspicious liquids next to the beaker, and then get your party to put them all on at once.
To fill up the beaker, just drop a suspicious liquid on top of it. As they are one-of-a-kind items, only one suspicious liquid can be held at a time. When the beakers are filled, they stop leaking and stop absorbing the suspicious liquids.
Homunculus
When all three beakers are full, all of the homonculus on the map will disappear, you will be rewarded with 20,000 exp, and a portal will open. Continue through the portal onto stage 4.
Stage 2
Stage 2
Monsters: Cyti, Homun

Stage 2 is fairly straightforward. Kill all the monsters and continue through the portal at the end. The one daunting aspect of this stage is the fact that you can only see a small area of the map around your character; all other areas of the map are dark.

Homun
Information coming soon.*
Picture unavailable
Cyti (Undead)
Level: 76
HP: 38,000
EXP: 360
When all the monsters on the map have been killed, you will receive 10,000 EXP, and you can continue through the portal on the right.
Monsters: Cyti, Homun
Stage 2 is fairly straightforward. Kill all the monsters and continue through the portal at the end. The one daunting aspect of this stage is the fact that you can only see a small area of the map around your character; all other areas of the map are dark.
Homun
Information coming soon.*
Picture unavailable
Cyti (Undead)
Level: 76
HP: 38,000
EXP: 360
When all the monsters on the map have been killed, you will receive 10,000 EXP, and you can continue through the portal on the right.
Stage 1
Stage 1
Monsters: None
To complete this stage, all you have to do is find a hidden switch to open the portal to stage 2. Scattered around the map hidden in piles of books and other items are hidden areas. To investigate these areas, you have to stand on top of them when you click them. If you stand too far, you'll get a message that tells you the area is too far to be investigated.

When you successfully investigate an area, one of five things will happen:

Once you press the switch, the secret portal will appear next to the NPC, and you can enter stage 2.
Monsters: None
To complete this stage, all you have to do is find a hidden switch to open the portal to stage 2. Scattered around the map hidden in piles of books and other items are hidden areas. To investigate these areas, you have to stand on top of them when you click them. If you stand too far, you'll get a message that tells you the area is too far to be investigated.
When you successfully investigate an area, one of five things will happen:
- You will find 500 mesos
- You will gain 500 EXP
- You will find nothing
- You will find Romeo/Juliet's letter (Juliet's if Zenumist, Romeo's if Alcadno)
- You will find a switch, and will be prompted to press it or leave it alone
Once you press the switch, the secret portal will appear next to the NPC, and you can enter stage 2.
Magatia PQ
Requirements:
This PQ was started in the Zenumist building, with the Romeo NPC. The PQ is basically the same from the Alcadno side, except with Romeo and Juliet's roles reversed.
To start the PQ, make your way to the Zenumist Society or Alcadno Society in Magatia and head into the hidden room. The Zenumist hidden room is the doorway at the top-right of the map, and the Alcadno hidden room is through the doorway above Maed. In the hidden room, assemble your party and speak to the NPC.

- A party of four people between level 71 and 85
- A thief with maxed haste OR someone with 120% jump (a thief with maxed haste is definitely easier due to the added speed)
- A magician with maxed teleport
- To complete the PQ successfully (i.e. save Romeo/Juliet) it is advised to have someone in your party who can freeze or stun
This PQ was started in the Zenumist building, with the Romeo NPC. The PQ is basically the same from the Alcadno side, except with Romeo and Juliet's roles reversed.
To start the PQ, make your way to the Zenumist Society or Alcadno Society in Magatia and head into the hidden room. The Zenumist hidden room is the doorway at the top-right of the map, and the Alcadno hidden room is through the doorway above Maed. In the hidden room, assemble your party and speak to the NPC.
Saturday, October 10, 2009
Exit
This will be the exit. There is a fountain for the marble that will cause the map to rain and heal your HP and MP very fast.
Just continue on to the next portal, which is also the exit.
Rewards
Click on Elin to receive an Altair Piece and get 52,000 EXP, which is about 5% even at level 55.(Old EXP table)
When you collect 20 Altair Pieces and have a B rank in the PQ, you can exchange them for an Altair Earring with Elin, which will add +1 to all stats. 30 Altair Pieces and an A rank in the PQ can be exchanged for a Shiny Altair Earring, which will add +2/3 to all stats. There is no bonus stage, nor is there a prize upon completion.
 - Altair Earring
 - Shiny Altair Earring
Getting ranks depends on the ratio of the completed and attempted PQ's or maybe the fastest time of completion of the PQ.
Just continue on to the next portal, which is also the exit.
Rewards
Click on Elin to receive an Altair Piece and get 52,000 EXP, which is about 5% even at level 55.(Old EXP table)
When you collect 20 Altair Pieces and have a B rank in the PQ, you can exchange them for an Altair Earring with Elin, which will add +1 to all stats. 30 Altair Pieces and an A rank in the PQ can be exchanged for a Shiny Altair Earring, which will add +2/3 to all stats. There is no bonus stage, nor is there a prize upon completion.
- Altair Earring - Shiny Altair EarringGetting ranks depends on the ratio of the completed and attempted PQ's or maybe the fastest time of completion of the PQ.
The sixth stage-boss stage
This is the boss area. Be forewarned, the boss Body 2 and Body 3 is quite formidable.
To summon the Poison Golem, drop the Purple Sorcery Stone in the middle of the statue.

Once dropped, the Poison Golem will spawn.
Stats of the Poison Golem -
Body 1 -

Poison Golem
Boss
Level: 65
HP: 63,000
MP: 300
Avoid: 18
Knockback: 1,500
EXP: -
Body 2 -

Poison Golem Level 2
Boss
Level: 75
HP: 83,000
MP: 400
Avoid: 18
Knockback: 1,500
EXP: -
Body 3 -

Poison Golem Level 3
Boss
Level: 85
HP: 113,500
MP: 500
Avoid: 18
Knockback: 10,000
EXP: 17,980
Skills of boss -
B1 - Nothing.
B2 - Cast large poison clouds that deals 50 damage per second and cast darkness + weakness.
B3 - In addition to its B2's skill, can cast "Reverse" and seal. Can also summon Poisoned Sprites, Poisoned Stone Bugs and Poisoned Tree Lords. Can heal itself and the surrounding mobs.
Attacks damages - The attack damages can range from 200 ~ 700, so make sure you have plenty of potions before engaging the Elin Forest Party Quest.
When defeated, it will drop potions (Like Frankenroid and Lord Pirate) and a marble that when drop at the exit stage, will cause the map to rain and heal your HP and MP very fast.
Once you killed it, congratulations! You can now proceed to the exit.
NOTE: The boss also drops Two-handed sword 60%, Dagger attack 60%, Staff MA 60%, Two-handed BW 60%, One-handed BW 60%, Claw for attack 60%, and Monster Card of the boss
To summon the Poison Golem, drop the Purple Sorcery Stone in the middle of the statue.
Once dropped, the Poison Golem will spawn.
Stats of the Poison Golem -
Body 1 -
Poison Golem
Boss
Level: 65
HP: 63,000
MP: 300
Avoid: 18
Knockback: 1,500
EXP: -
Body 2 -
Poison Golem Level 2
Boss
Level: 75
HP: 83,000
MP: 400
Avoid: 18
Knockback: 1,500
EXP: -
Body 3 -
Poison Golem Level 3
Boss
Level: 85
HP: 113,500
MP: 500
Avoid: 18
Knockback: 10,000
EXP: 17,980
Skills of boss -
B1 - Nothing.
B2 - Cast large poison clouds that deals 50 damage per second and cast darkness + weakness.
B3 - In addition to its B2's skill, can cast "Reverse" and seal. Can also summon Poisoned Sprites, Poisoned Stone Bugs and Poisoned Tree Lords. Can heal itself and the surrounding mobs.
Attacks damages - The attack damages can range from 200 ~ 700, so make sure you have plenty of potions before engaging the Elin Forest Party Quest.
When defeated, it will drop potions (Like Frankenroid and Lord Pirate) and a marble that when drop at the exit stage, will cause the map to rain and heal your HP and MP very fast.
Once you killed it, congratulations! You can now proceed to the exit.
NOTE: The boss also drops Two-handed sword 60%, Dagger attack 60%, Staff MA 60%, Two-handed BW 60%, One-handed BW 60%, Claw for attack 60%, and Monster Card of the boss
The fifth stage
The fifth stage is a jump quest with false bottoms, much like the 3rd John's Request quest.
First, the party must climb up ropes in order to reach the jump quest area. Once you reach a area with lots of bottoms, select which area to climb. There is 3 area, one at the left, one at the right, and the middle. Once you get to the top of the "bottoms area", climb up the rope. Be wary of flying throwing stars. Once you reach the top, hit all 3 boxes. If a Purple Magic Stone drops, loot it and say "done" to your party. Jump down and give it the the NPC "Sprite". You will then be transported to the final stage.
First, the party must climb up ropes in order to reach the jump quest area. Once you reach a area with lots of bottoms, select which area to climb. There is 3 area, one at the left, one at the right, and the middle. Once you get to the top of the "bottoms area", climb up the rope. Be wary of flying throwing stars. Once you reach the top, hit all 3 boxes. If a Purple Magic Stone drops, loot it and say "done" to your party. Jump down and give it the the NPC "Sprite". You will then be transported to the final stage.
The fourth stage
The fourth stage is like the Ariant Coliseum, where you need to click on Elin to receive 10 "Transparent marbles" in the USE inventory to capture a monster.

Instead of scorpions, the monster to be captured is the Poison Sprite.
Like the Ariant Coliseum, weaken the Poison Sprite and than capture it (Use the Transparent Marble). The marble will then be converted/"purified" into an ETC item.
Once you successfully captured a Poisoned Spirte, the following animation will appear -

The party needs 20 of the ETC item. After collecting all 20, pass them to the leader and he will talk to Elin which will then "purify" one of the marble. An NPC "Sprite" will then appear. The leader needs to click on the NPC to go on to the next stage.
The stats of the Poison Sprite is as following -

Poisoned Sprite
Level: 65
HP: 7,500
MP: 100
Avoid: 0
Knockback: 1,200
EXP: -
If you accidentally kill one, it will automatically revive.
Instead of scorpions, the monster to be captured is the Poison Sprite.
Like the Ariant Coliseum, weaken the Poison Sprite and than capture it (Use the Transparent Marble). The marble will then be converted/"purified" into an ETC item.
Once you successfully captured a Poisoned Spirte, the following animation will appear -
The party needs 20 of the ETC item. After collecting all 20, pass them to the leader and he will talk to Elin which will then "purify" one of the marble. An NPC "Sprite" will then appear. The leader needs to click on the NPC to go on to the next stage.
The stats of the Poison Sprite is as following -
Poisoned Sprite
Level: 65
HP: 7,500
MP: 100
Avoid: 0
Knockback: 1,200
EXP: -
If you accidentally kill one, it will automatically revive.
The third stage(Elin PQ)
This stage has no monster that is needed to be defeated. However, this stage presents a maze of portals, much like the quest "Camila's Gem"

As you can see from the screenshot above, there is 3 portals in a "group". It is unknown how many "groups" there are. (Nobody bothers to count them anyway.)
It is assumed that every time you PQ, where the same portal will lead you to is randomized. To progress, the party must split up and try to go to the same "group" that Elin is. Only ONE member is needed to click on Elin. As long as the one member click Elin to go to the next stage, the whole party will be transported as well.
The second stage(Elin PQ)
In this room, there is a huge tree with a bulbous green growth near the base.

As you enter, numerous Poisoned Stone Bugs will spawn. Lure them to the green growth first before killing it. Killing it before it is at the green growth is useless.
The bugs have a Super Weapon Defense Up, a buff that negates all physical attacks. However, this skill is pretty useless as it is not much of a liability and it holds up for a very short period of time. The stats of the Poisoned Stone Bugs is as following -

Poisoned Stone Bug
Level: 65
HP: 7,200
MP: 100
Avoid: 0
Knockback: 1,200
EXP: 255
Once you kill them, they might drop a useless Purple Poison bottle that can't be picked. Once dropped on the green growth, a Pink Diluted Poison bottle will appear. You only need 4 of them. Once you have 4 of the Pink Diluted Poison, go to the most right of the map and you will see a green thornbush. Drop the Pink Diluted Poison there ONE by ONE.
The thornbush will eventually disappear and you can go on to the next stage.
As you enter, numerous Poisoned Stone Bugs will spawn. Lure them to the green growth first before killing it. Killing it before it is at the green growth is useless.
The bugs have a Super Weapon Defense Up, a buff that negates all physical attacks. However, this skill is pretty useless as it is not much of a liability and it holds up for a very short period of time. The stats of the Poisoned Stone Bugs is as following -
Poisoned Stone Bug
Level: 65
HP: 7,200
MP: 100
Avoid: 0
Knockback: 1,200
EXP: 255
Once you kill them, they might drop a useless Purple Poison bottle that can't be picked. Once dropped on the green growth, a Pink Diluted Poison bottle will appear. You only need 4 of them. Once you have 4 of the Pink Diluted Poison, go to the most right of the map and you will see a green thornbush. Drop the Pink Diluted Poison there ONE by ONE.
The thornbush will eventually disappear and you can go on to the next stage.
The first stage(Elin PQ)
The first stage has a simple goal. Just kill all the Poisoned Tree Lords. Note that it has a ranged attack like Peach Monkeys of Mu Lung. It will "shoot" a seed to damage your character. The stats of the Poisoned Tree Lord is as following -

Poison Tree Lord
Level: 62
HP: 6,100
MP: 100
Avoid: 0
Knockback: 1,000
EXP: 235
Do note that the stats might not be accurate as it is from an external source.
The Poisoned Tree Lord spawns at the bottom and the three top platforms. It is wise to divide the party into one member per platform to ulitize the most efficient way of clearing this stage.

Once all Poisoned Tree Lords is defeated, you can go on to the next stage.
Poison Tree Lord
Level: 62
HP: 6,100
MP: 100
Avoid: 0
Knockback: 1,000
EXP: 235
Do note that the stats might not be accurate as it is from an external source.
The Poisoned Tree Lord spawns at the bottom and the three top platforms. It is wise to divide the party into one member per platform to ulitize the most efficient way of clearing this stage.
Once all Poisoned Tree Lords is defeated, you can go on to the next stage.
Introduction to Elin Forest
What is Elin Forest PQ?
It is a Party Quest done in Elin Forest, known as Victoria Island's Past, although its exact map name is Deep Fairy Forest. It is also known as "Forest of Poison Fog Party Quest". Upon entering the PQ, your character will be transformed into the Legendary Heroes according to your class. Do note that you are given 30 minutes to clear this PQ.
Requirements of Elin Forest PQ
Level between 45 - 55
3 - 5 party members
No exact job is needed, unlike the Ludiburim PQ, Orbis PQ and Magatia PQ.
Entering the Elin Forest PQ -
Just create a party of 3 - 5 members and find an empty channel. Your leader/you must then click on Elin(Obviously.) You will then be transported to a map. Enter the portal and you will be transformed into the legendary heroes. Enter another portal. Now is where the real PQ starts.
Where is Elin Forest PQ located at?
Elin Forest is reached by entering the Door of Time, located at the most top right corner of the Helious Tower 100th Floor, Ludibruim. To reach the PQ area, enter the most right portal at the town. You will reach another map. Just continue going right.
VERY IMPORTANT NOTE
Knights of Cygnus cannot enter this PQ due to the game not knowing what to change you into.
Engage this PQ ONLY when you have a decent amount of potions. The boss's third form can hit up to 700 damage.
Neo Tokyo
There will be a series of new quests that will bring you around the Neo Tokyo maps.
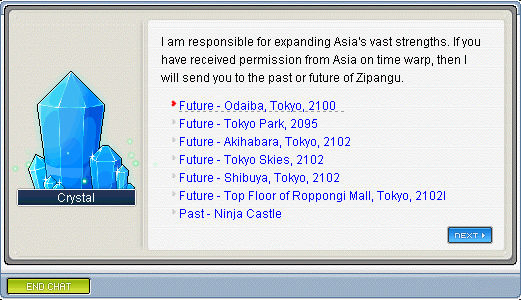
Apart from completing quests, you will get to know more about Ancient Zipangu, Present Zipangu and Future Zipangu! Travel through time to prevent Zipangu from being destroyed by machines!
Head over to Neo Tokyo from the portal located at Mushroom Shrine, Zipangu!
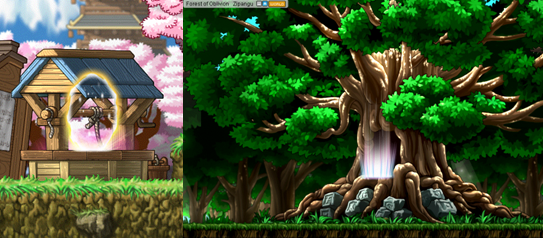
1. Portal located at Mushroom Shrine 2. Forest of Oblivion

3. NPC Asia at Kamuna, Zipangu 4. Odaiba, Tokyo
Besides Odaiba, you will also venture to other maps and time according to your quest progress.
A short preview of the past and the future of Zipangu.
Meet the junior Dida and Marr at Tokyo Park, assist Dida in whatever way you can as he is the key to the future!

Besides meeting the key characters in Neo Tokyo, you will also get to encounter uncountable boss monsters that require great determination and skills to defeat.
Monster
Dunas

Nameless Magic Monster

Nibergen

Vergamot
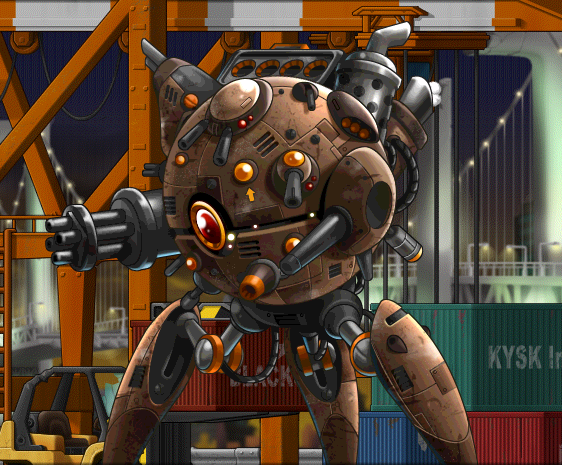
Summoned Auf Haven

Auf Haven

Subscribe to:
Posts (Atom)
